Getting Started
The following example describes the creation of a simple operator app with OPC-UA communication. The example app consists of a view displaying the current temperature and an input field for entering the limit value.
-
Step 1:
Create Operator AppThe operator app is created using the Unified-E App Designer via drag & drop. Programming knowledge is not required for app development. Your app will automatically run on Android, iOS and Windows devices.
Create New Project
-
Please download the Unified-E App Designer here and follow the installation instructions:
-
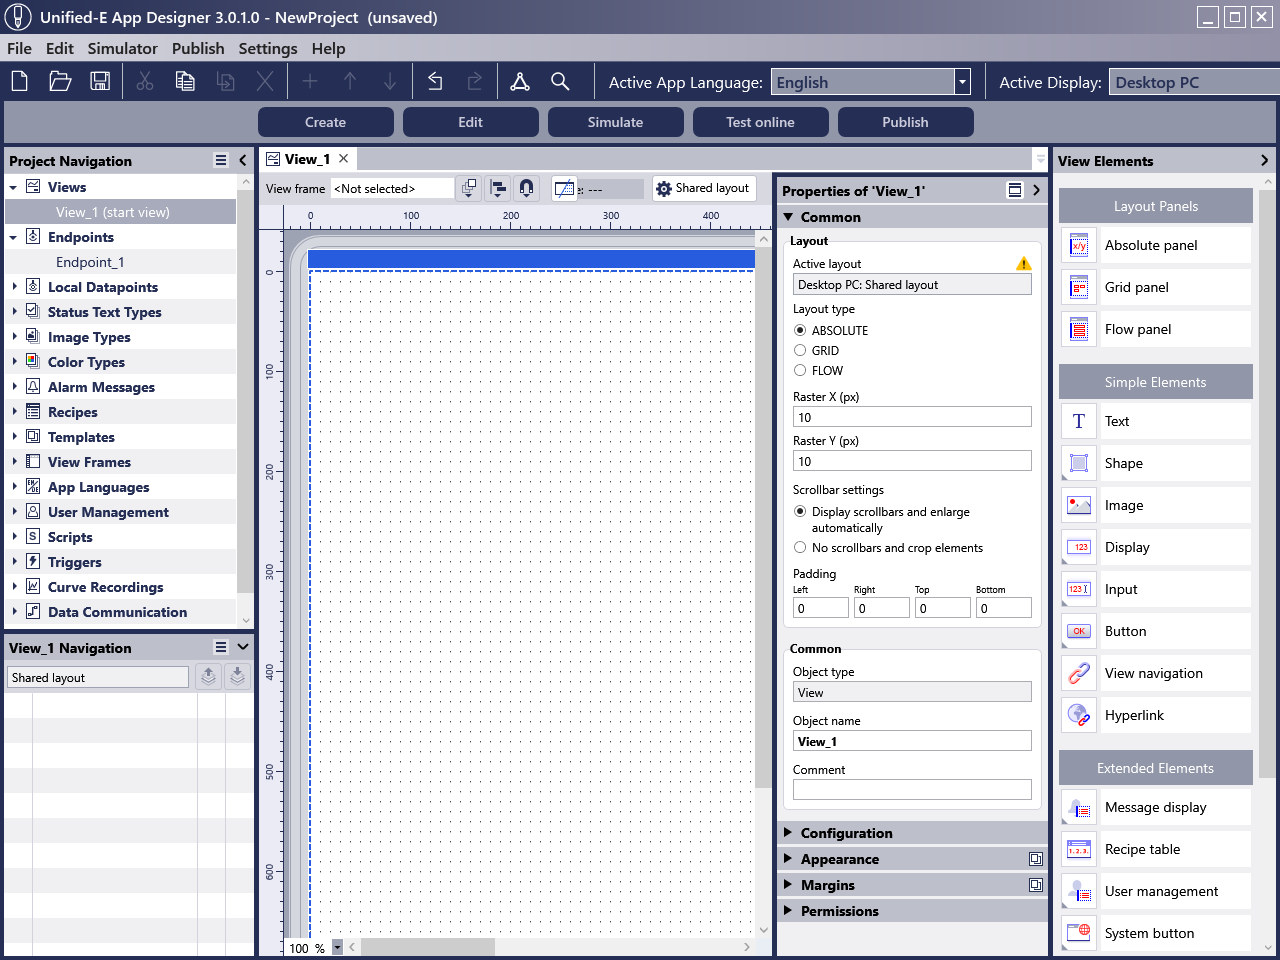
Start the Unified-E App Designer. In the start view, select "New" -> "Create Project".
- Familiarize yourself with the intuitive interface. On the left is the project navigation, in the middle is the view editor with the properties area, and on the right is the catalog with the drag & drop view elements.
Set Up Communication with Endpoints
Next, specify which endpoints or datapoints (e.g., PLC variables, SQL queries) the operator app should communicate with.
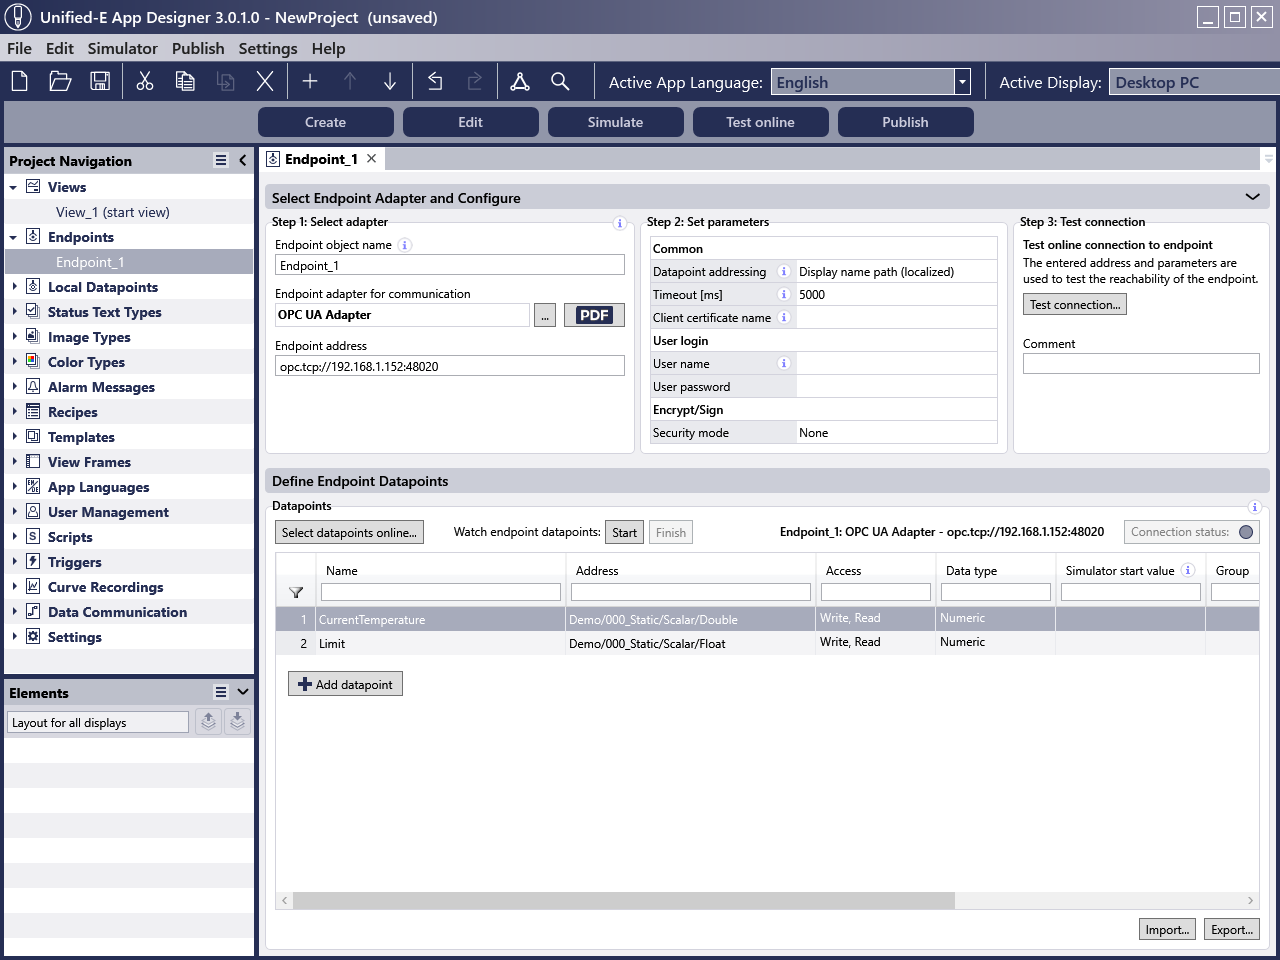
- Open the endpoint editor by double-clicking the "Endpoint_1" node in the "Project Navigation" area.
- Click on "..." in the adapter area and select the OPC UA adapter in the dialog.
- Set the address to the OPC UA server. Details can be found in the manual, which can be opened with the PDF button. You can also choose another endpoint adapter that is accessible from the App Designer PC.
- Add the two datapoints "CurrentTemperature" and "Limit" to the datapoints list. New datapoints can be created with the "+ Add New Datapoint" button.
- Set the address and datapoint properties in the table as shown in the image below:
Configure View Using Drag & Drop
Now that the datapoints are defined, switch back to the view editor to configure the views of the operator app.
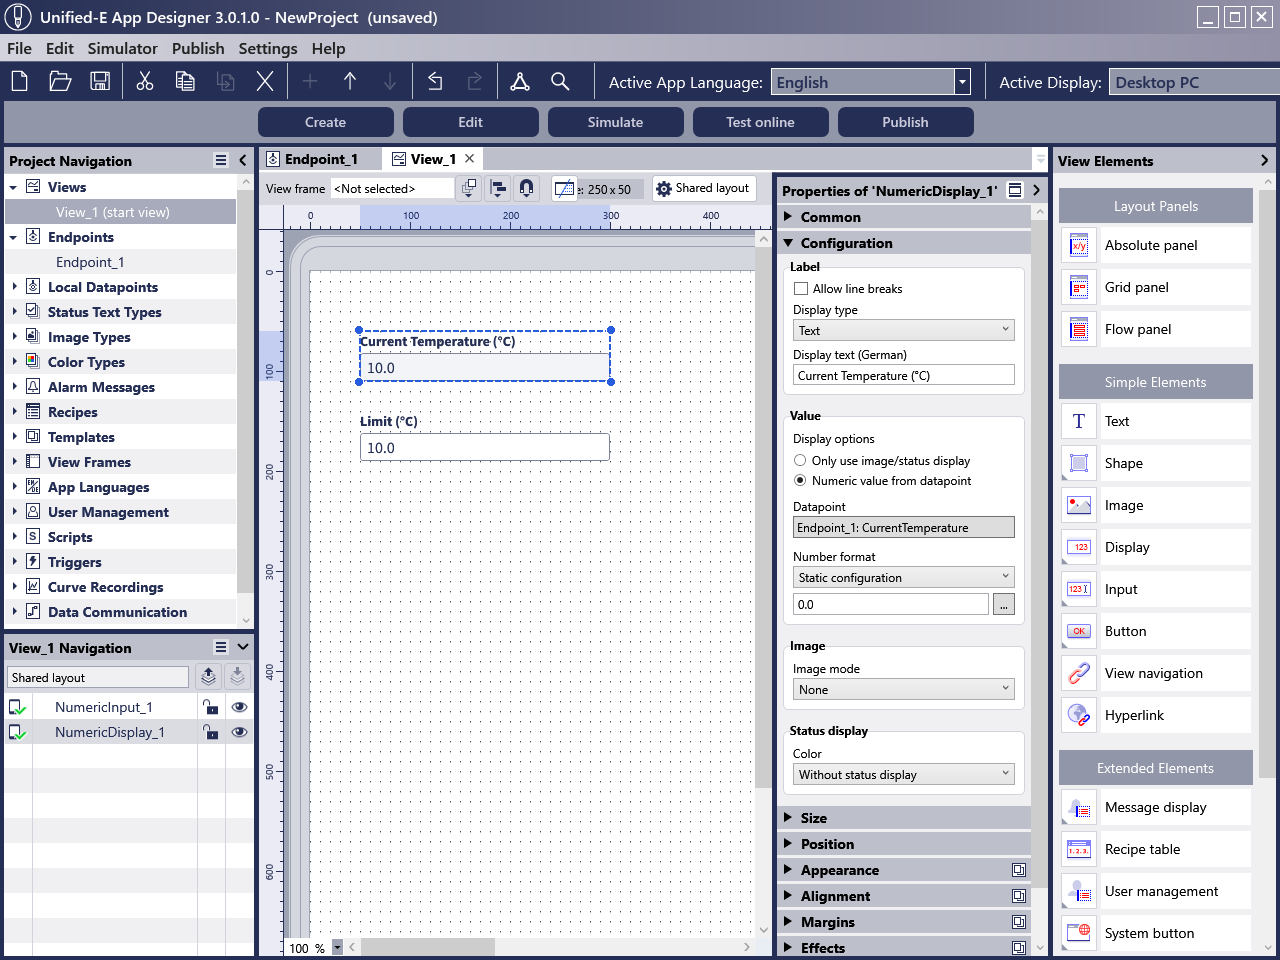
- Reopen the view editor by double-clicking the "View_1" node in the project navigation.
-
Insert temperature display:
- Drag the "Numeric Display" element onto the view background with the mouse.
- Select the newly created display and set the display text in the properties area under Configuration -> Label.
- Additionally, set the datapoint "Endpoint_1: CurrentTemperature" under Configuration -> Value.
- Drag the "Numeric Display" element onto the view background with the mouse.
-
Insert limit input:
- Drag the "Numeric Input" element onto the view background with the mouse.
- Select the newly created input and set the display text in the properties area under Configuration -> Label.
- Additionally, set the datapoint "Endpoint_1: Limit" under Configuration -> Value.
- Drag the "Numeric Input" element onto the view background with the mouse.
Test App Configuration
The created app can be tested directly on the App Designer PC without an operator device. During the app test, simulated values or values from a real endpoint with endpoint connection can be used. The current values of the datapoints are displayed under Endpoint_1.
-
Testing with Simulated Values:
- Start the test with the "Simulate" toolbar button.
- You can change the values in the datapoint table under the "Simulated Values" column.
- Start the test with the "Simulate" toolbar button.
-
Testing with Endpoint Connection:
- Ensure that there is a connection between the PC and the endpoint.
- Start the test with the "Test online" toolbar button.
- Ensure that there is a connection between the PC and the endpoint.

-
Please download the Unified-E App Designer here and follow the installation instructions:
-
Step 2:
Set Up Gateway PCIf the operator app communicates directly with the endpoints without a gateway, the App Manager is not needed. You can proceed directly with step 3.
For gateway communication, the Unified-E App Manager program must first be downloaded and installed on the PC located in production or at the machine. This turns the PC in production into a gateway and acts as a link between the endpoints and operator devices. All endpoints must therefore be reachable from the gateway PC.Install App Manager
-
Download App Manager:
-
Start and License App Manager:
The functions of the App Manager are only activated after logging in with a gateway license. This is requested when starting the application. If you have not yet purchased a license, you can continue with a free trial license.
The quickest way to get to the trial license is as follows:
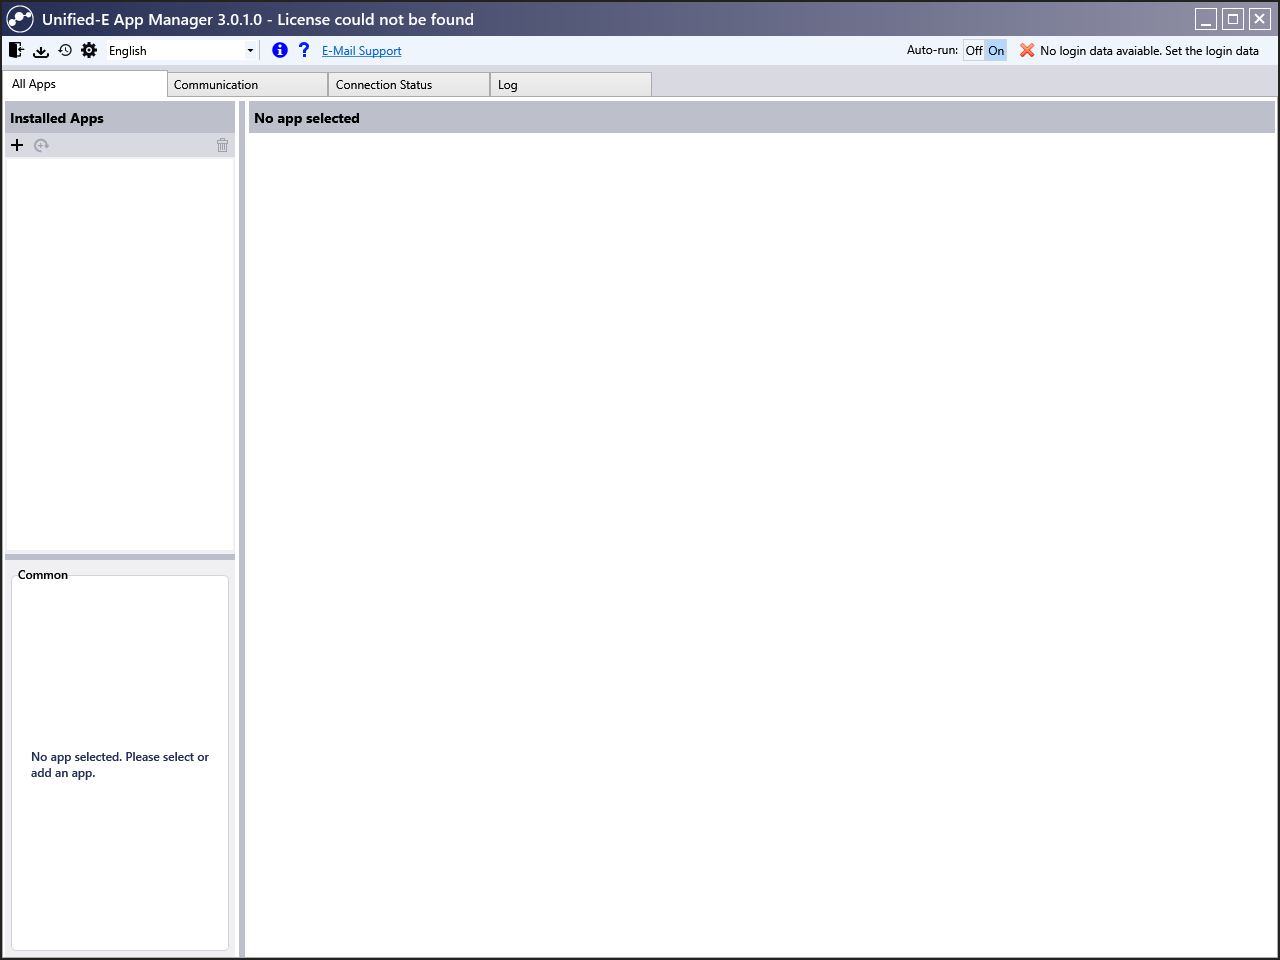
- In the App Manager, select the "Communication" tab
- Under "Register Gateway", select the "Free License" link.
- In the "Free Gateway License" dialog (see below), select the "Free Trial License" option.
- Click "Apply". After about a minute, the messaging service is activated for firewall-friendly communication. After successful setup, the status "The gateway is ready for operation" appears at the top right.
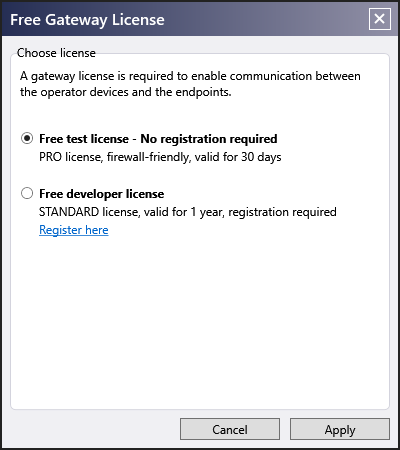
- In the App Manager, select the "Communication" tab
-
Setting for Future Operator App Installations Directly from the App Designer:
To later register the app package to be published either locally or remotely over the network directly from the App Designer, the following setting must be made in the App Manager:
- In the App Manager, select the "Security" tab under Settings (gear icon in the main menu).
- Check the "Install apps remotely" checkbox (see image).
- Security Note: This checkbox should only remain checked during the test phase. During production, the checkbox should not be checked, and updates should always be performed directly at the App Manager for security reasons.

-
Download App Manager:
-
Step 3:
Publish App PackageAfter creating the operator app in Step 1 and setting up the gateway PC in Step 2 (only necessary if communication is to take place via the gateway PC), an app package must be created and published from the operator app in the App Designer. This app package is then installed on the operator device (e.g. Windows computer, smartphone). When publishing the app package, it is important to distinguish whether the operator app will later communicate indirectly via the gateway or directly with the endpoints.
Publish App Package for Gateway Communication
-
Provide App Package:
- In the App Designer, click "Publish" in the toolbar.
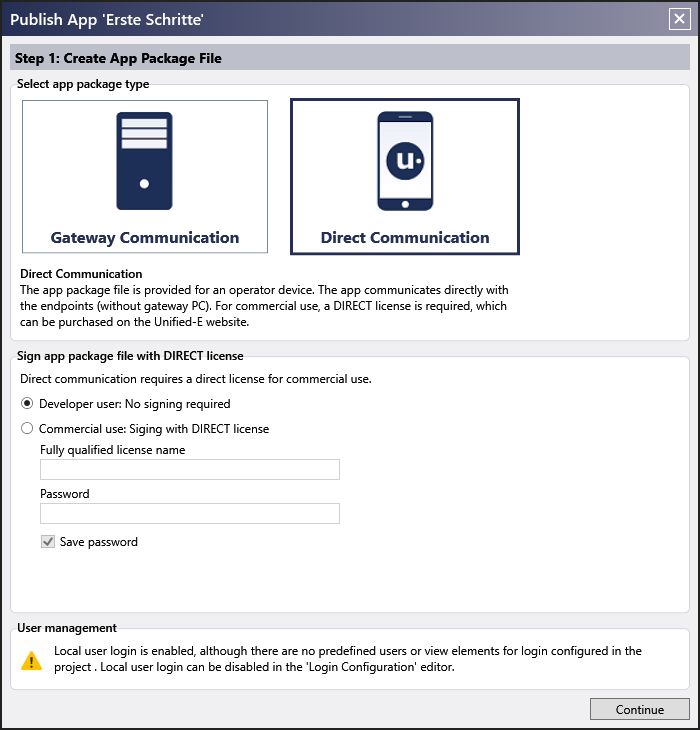
A dialog for publishing the app package will then appear. - Select "Gateway Communication" in the dialog below.
- Click "Continue" to generate the app package and proceed to the next step to publish it.
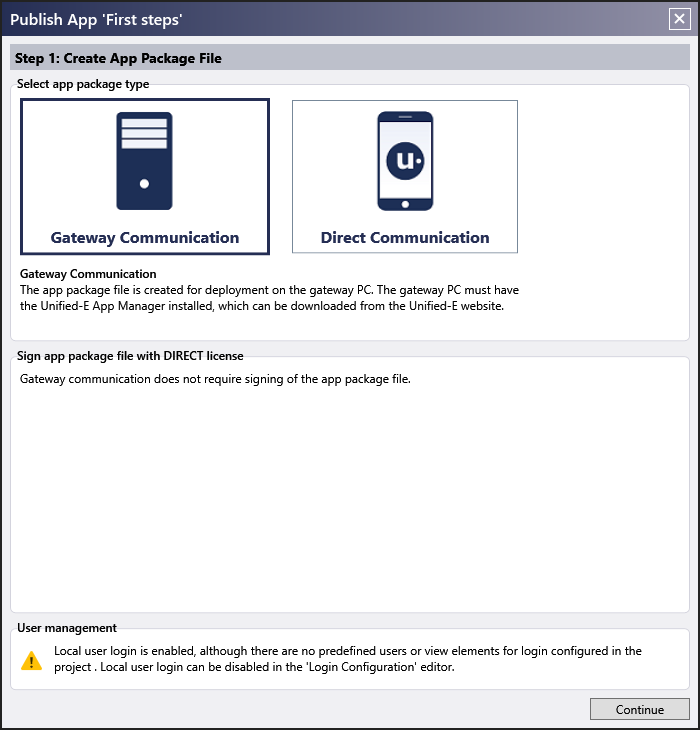
- In the App Designer, click "Publish" in the toolbar.
-
Publish App Package:
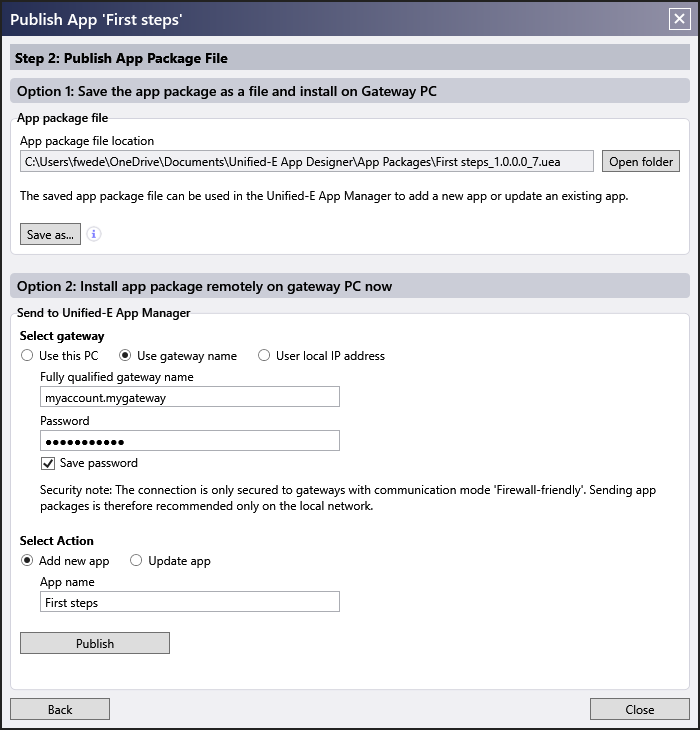
The created app package file from the App Designer is saved as a .uea file and can now be installed in the Unified-E App Manager. In this example, it is assumed that the App Designer and App Manager are installed on the same PC. Proceed as follows:
- Select the option "Use this PC".
- Under "Select Action", select "Add new app" and enter the app name "Getting Started".
- By clicking the "Publish" button, a new operator app will be installed in the App Manager.
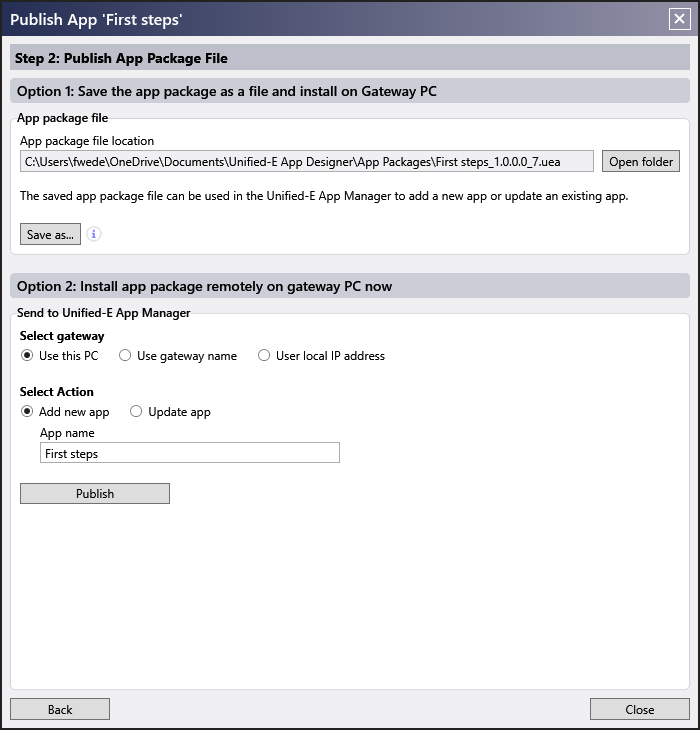
If the App Manager is installed on a remote PC, a publishing remotely would be carried out by entering the gateway license and the app name, as illustrated here:
- Select the option "Use Gateway Name".
- Enter the fully qualified gateway name and the password assigned to you during licensing.
- Under "Select Action", select "Add new app" and enter the app name "Getting Started".
- By selecting the "Publish Now" button, a new operator app will be installed in the App Manager.
- Select the option "Use this PC".
Publish App Package for Direct Communication
-
Provide App Package:
- In the App Designer, click "Publish" in the toolbar.
A dialog for publishing the app package will then appear. - Select "Direct Communication" in the dialog below. For trial purposes, no direct license is required, so the option "Developer user: No signing required" can also be selected for app package signing.
- Click "Continue" to generate the app package and proceed to the next step to publish it.
- In the App Designer, click "Publish" in the toolbar.
-
Publish App Package:
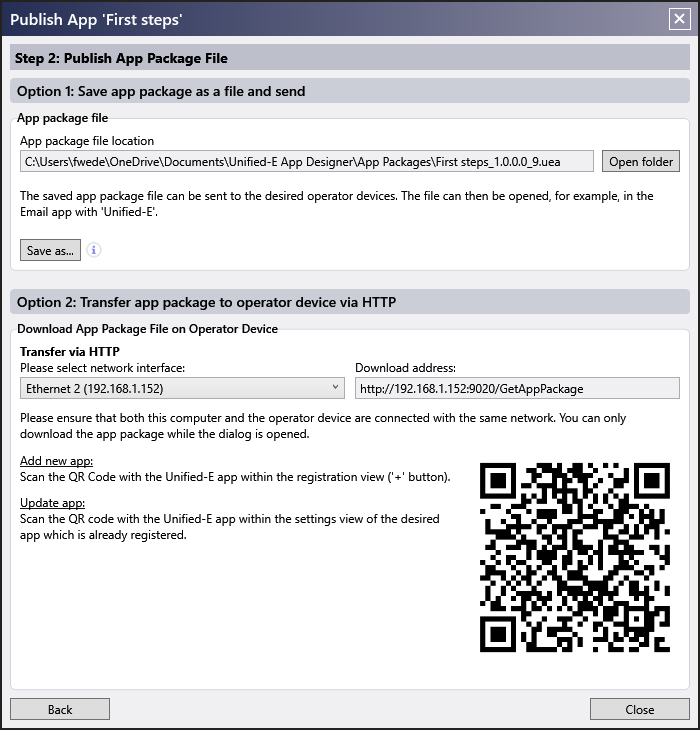
The created app package file is saved as a .uea file and is now to be provided to the operator device users. There are several options for this:
- Send the app package as an email attachment to authorized users.
- Provide the app package via HTTP on the network and announce the URL of the app package.
- Authorized users can download the app package directly from the App Designer computer by scanning the QR code (see dialog below).
- Send the app package as an email attachment to authorized users.
-
Provide App Package:
-
Step 4:
Install App Package on Operator DeviceTo operate the created operator app, it must be embedded in a Unified-E Client from the app stores (or for Windows from the download area). The Unified-E Client must first be installed on the operator device (e.g. Windows computer, smartphone) and serves as a kind of operator app container.
Install Unified-E Client and Register Operator App
-
Install Unified-E Client
The following platforms are currently supported:
- Windows from version 7.0: Download "Unified-E Client" application from the download area
- Android from version 7: Download "Unified-E" app from Google Play
- iOS from version 12: Download "Unified-E" app from the App Store
- Windows from version 7.0: Download "Unified-E Client" application from the download area
- Register Operator App
Here, it is also necessary to distinguish whether the operator app should communicate directly via gateway or directly with the endpoints.
Register Operator App for Gateway Communication
For this, the App Manager and the Unified-E Client are required. In the App Manager, an authorized user (administrator) must first start the registration process for the operator app. Then, the operator app is registered on the smartphone by scanning a registration code.
-
Administrator:
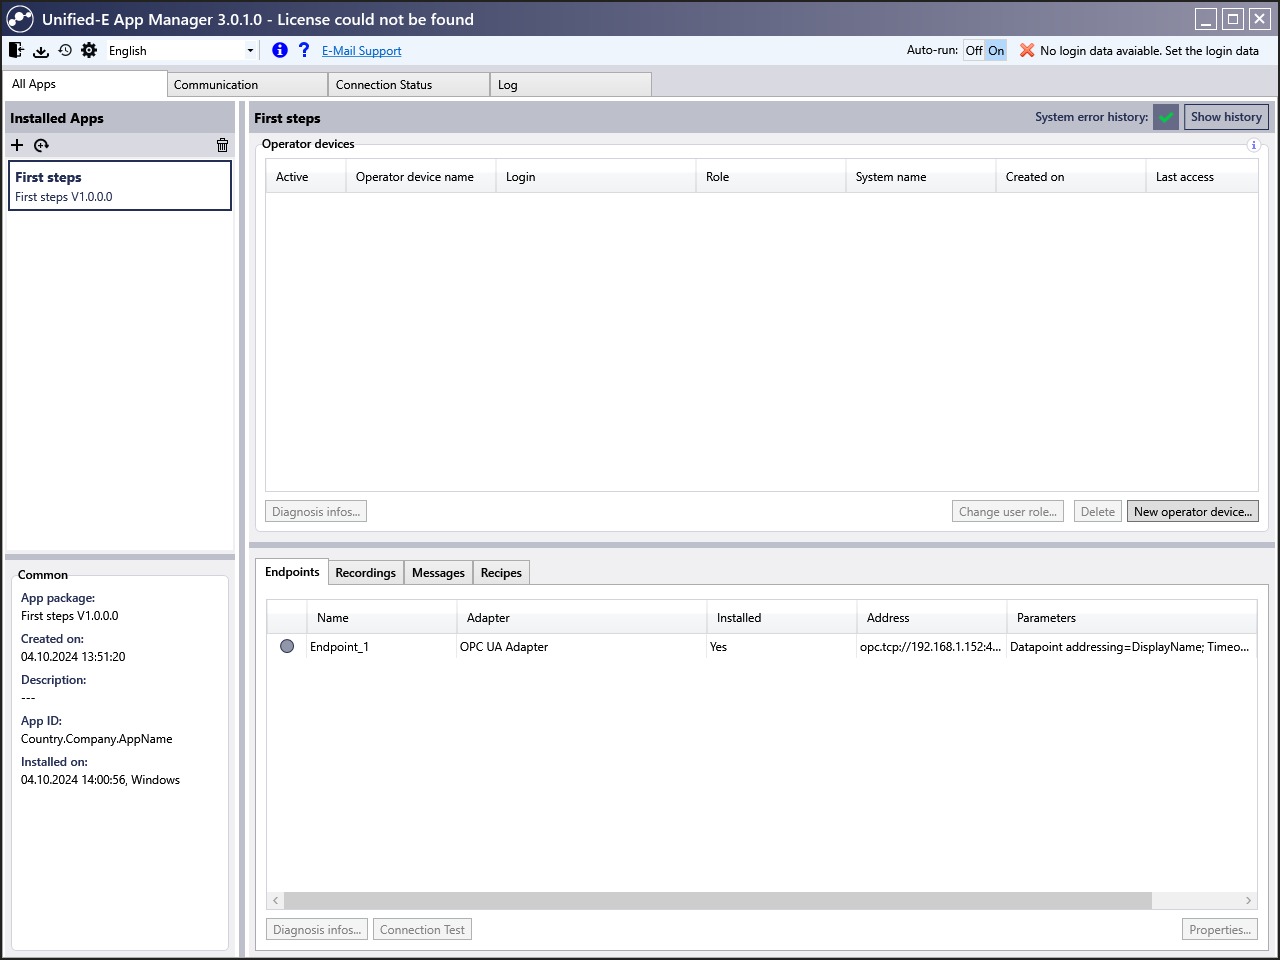
- Start Unified-E App Manager.
- Select the "All Apps" tab in the App Manager.
- Select the operator app in the "Installed Apps" section by clicking on "+".
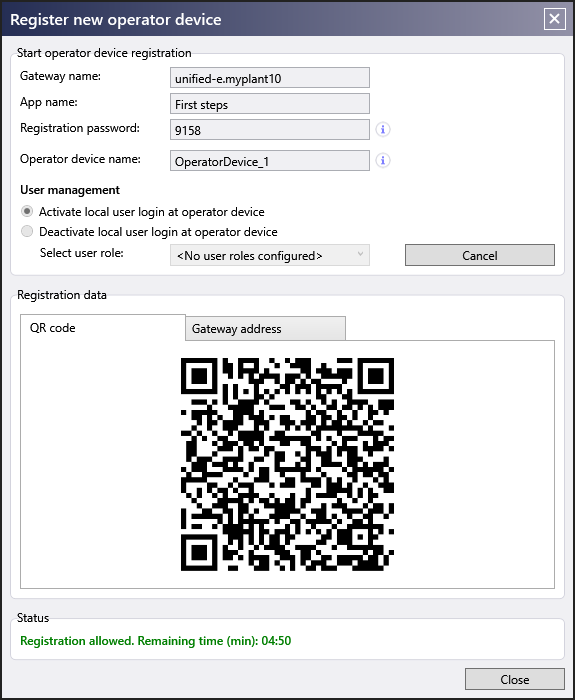
- Click the "New Operator Device" button in the "Operator Devices" section.
- In the "Register New Operator Device" dialog, enter the operator device name and select "Start".
- Start Unified-E App Manager.
-
App User:
- Start "Unified-E" app.
- Navigate to app registration via the "+" symbol.
-
In the following screen, select the "Scan" button in the "Gateway Communication" section.
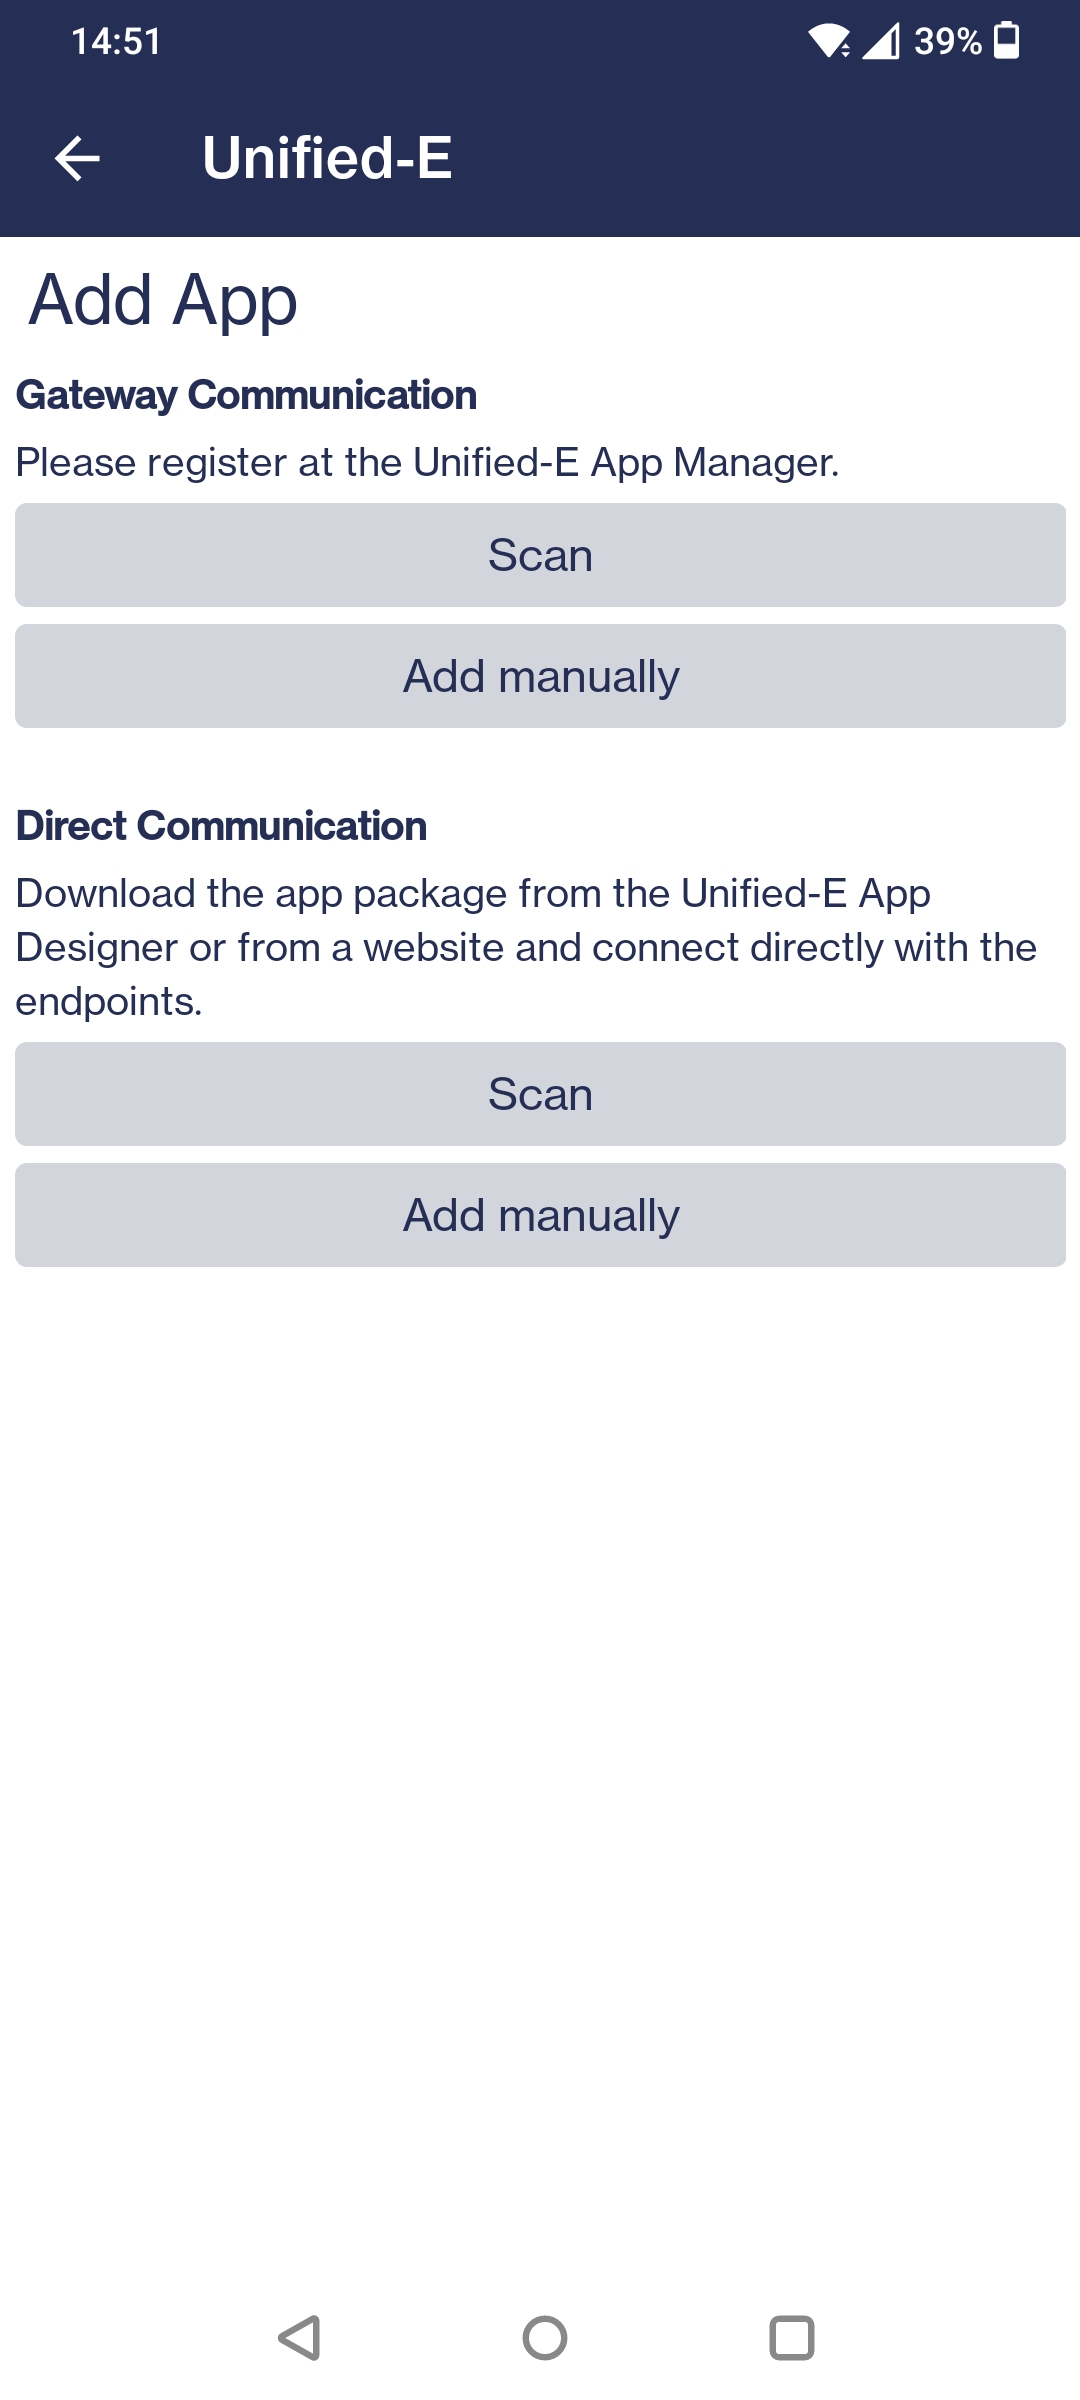
-
Then scan the QR code from the dialog in the App Manager. This completes the registration process.
- Start "Unified-E" app.
Register Operator App for Direct Communication
In this example, the OPC-UA server must be directly accessible from the operator device (e.g. Windows computer, smartphone) via WLAN to enable direct communication between the operator device and the OPC-UA endpoint.
There are several ways to register the operator app.Option 1:
Register app package via URL in the "Unified-E" app- Start the "Unified-E" app.
- Select the "+" symbol at the top right to register the app.
-
In the following screen, select the "Scan" button in the "Direct Communication" section and scan the QR code from the "Publish App Package" dialog in the App Designer. This completes the registration process.
Option 2:
The app package is sent via email to the smartphone (for iOS & Android). In this case, open the email attachment (.uea file) with the "Unified-E" app. After assigning a new app name, the operator app is registered.- Open the app package from the email attachment with "Unified-E".
- In the following screen, select "New App", assign a new name, and click the "Apply" button. This completes the registration process.
-
Install Unified-E Client
-
Step 5:
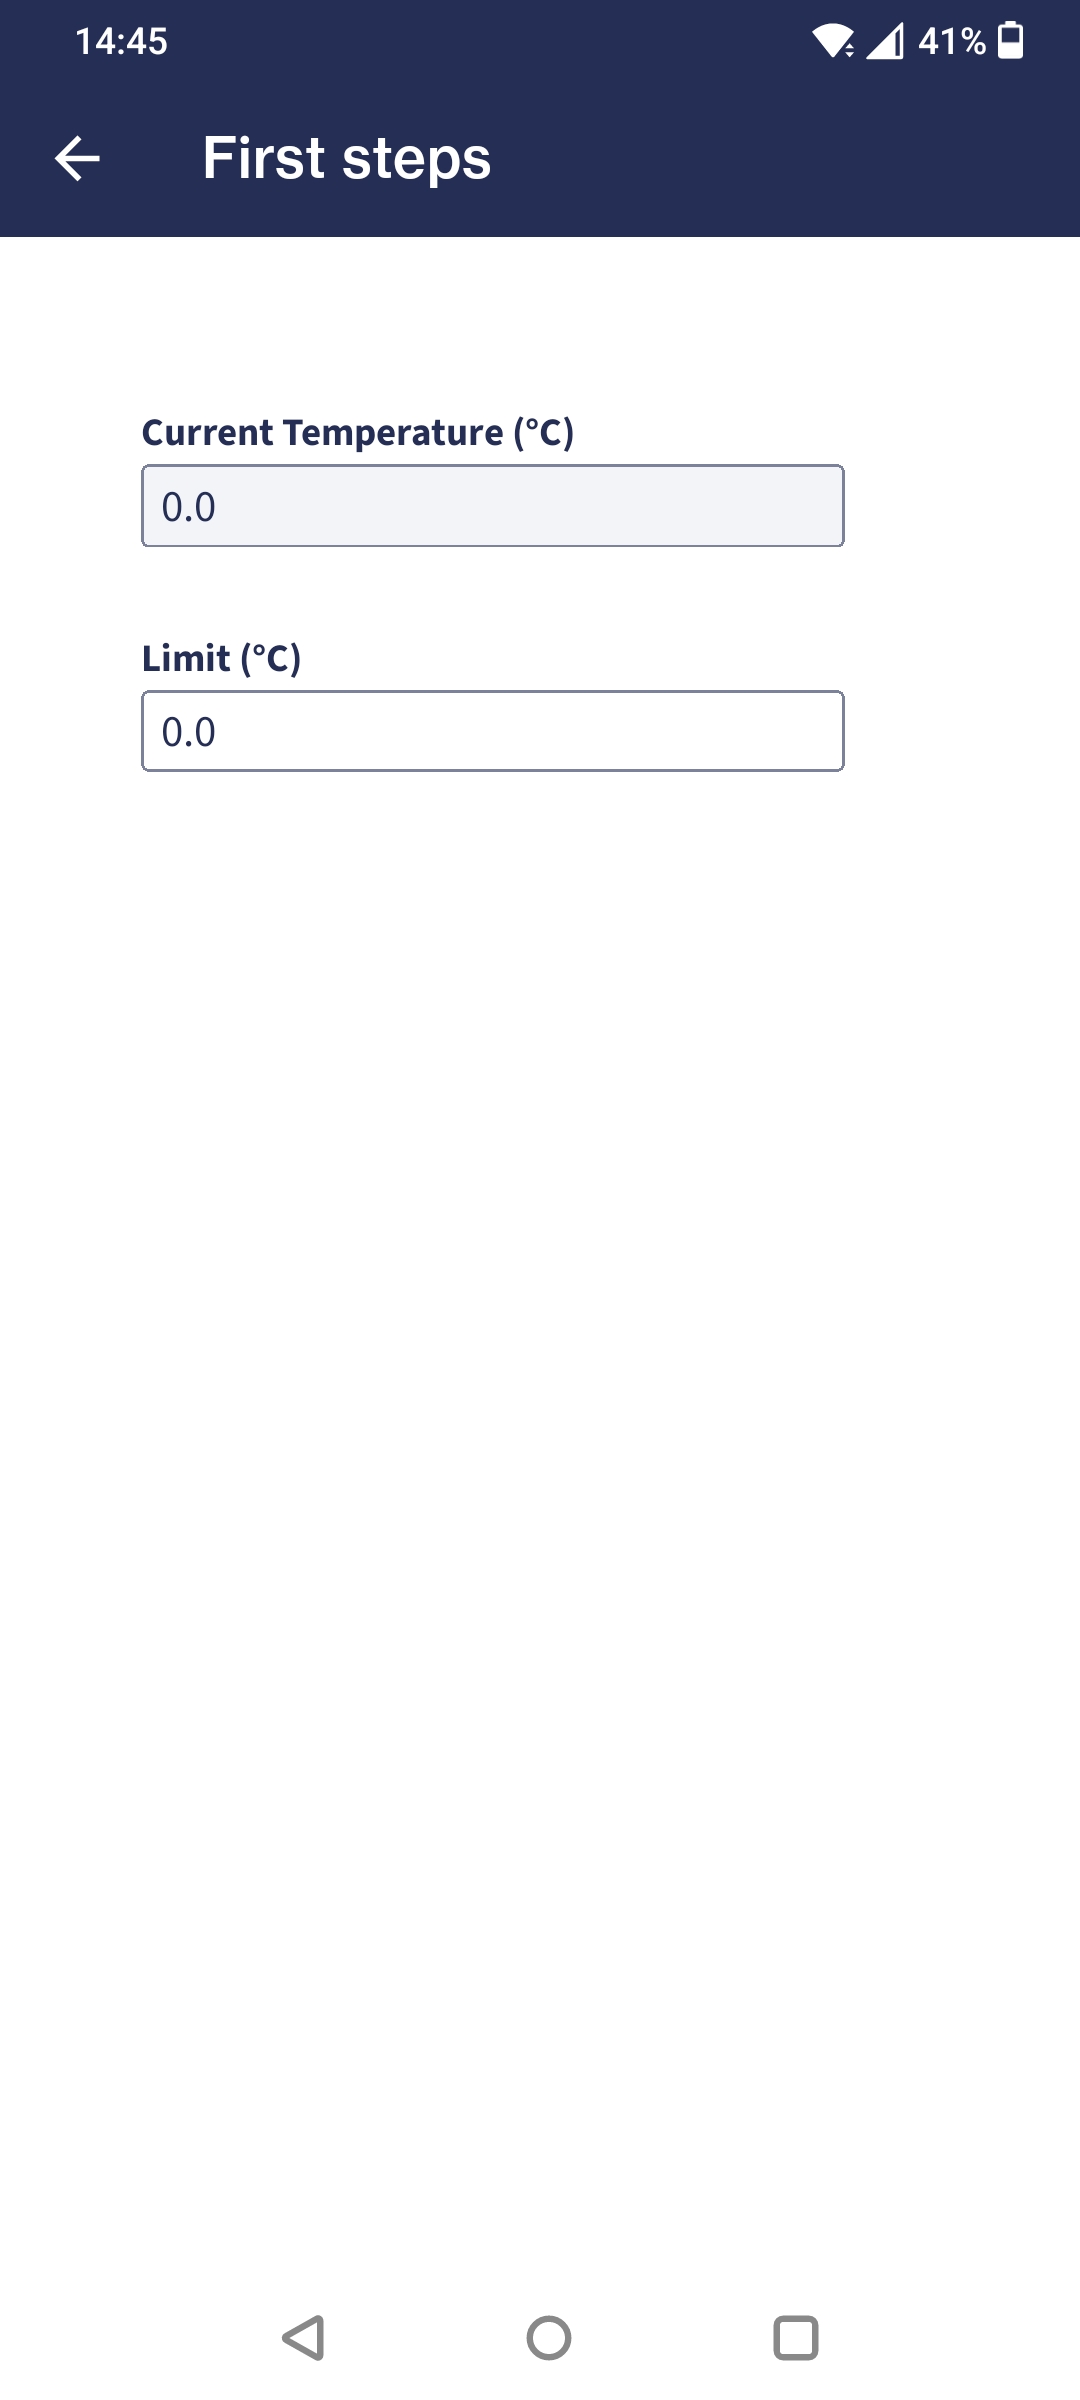
Start Operator App!The registered operator app can now be started from the start view of the "Unified-E" app.
The view configured in step 1 will appear.